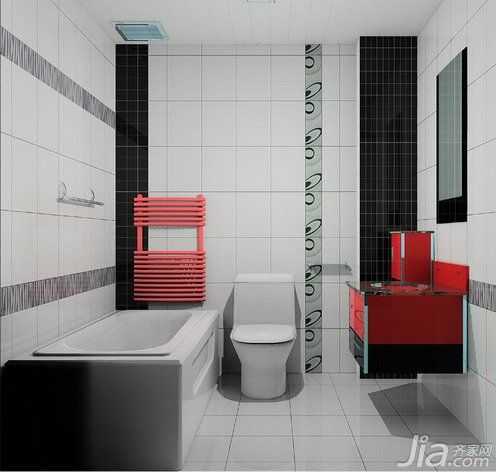
Before paving: Always check the product before applying
Look at product packaging:
Qualified tiles are generally packaged in cartons (while external products and processed products are not normally packaged in cartons, but are directly secured by foam or rope). Manufacturers' names, product names, trademarks, specifications, and sizes should be printed on the packaging box. Level, weight, color number, and quantity. Special attention should be paid to whether the grade is the same as the one used at the time of purchase, so as to prevent the merchant from using a level of premium or the like as a qualified product, and whether the color number is the same. Generally, the same product and the same color number are laid in the same space to prevent chromatic aberration. Except special effects).
Look product appearance:
National standards stipulate that the surface quality of excellent products should be observed perpendicularly at a height of 0.8 meters. At least 95% of the surface is free of obvious defects. Of course, if this standard is followed, most products can meet the standards, but we mainly do not look at 95%, but we must Obvious defects. Randomly inspect a few tiles from the packing box to see whether the surface of the product has the following defects: ripples, spots, glazes, bumps, cracks, lack of glaze, etc. There are tiles on the back of each tile to see if the bottom mark is consistent and no adhesive attachments are allowed on the back and sides.
Tile paving process:
Grassroots processing → elastic line → pre-shop → paving → grooving → cleaning
Primary treatment: Dust, debris thoroughly cleaned, no emptying, cracking and sanding defects.
Lines: Elevation control lines are popped around the wall before construction, and crosshairs are popped on the floor to control the floor separation.
Pre-paving: First of all, on the basis of drawing design requirements, we should strictly select the color, texture, and surface smoothness of the floor tiles, and then pre-shop according to the drawings. The size, color and texture errors that may occur in the pre-paving are adjusted and exchanged until the best effect is achieved, and the paving is smoothly stacked and stored.
Paving: Lay a 1:3 dry hard cement mortar with a mortar thickness of about 25mm. Before the tile is applied, the back of the tile shall be wetted. Place the tiles on the cement mortar as required and tap the tile finish with a rubber mallet until the flatness is reached.
Cushioning: Clean the joints 24 hours after the floor tiles are laid, and clean the gaps in the floor tiles before jointing. Use a special joint sealant to make joints.
Clean up: During the construction process of home-applied tiles, follow the process of dry cleaning. After completion (usually after 24 hours), use cotton yarns and other objects to process the surface of the tiles.
Tile laying quality:
The surface of the tiles is clean, the pattern is clear, the color is the same, the joints are even, the periphery is straight, and the joints are smooth and smooth, and the plates are free of cracks, falling angles, and missing defects.
Laying of wall tiles:
1: When the grassroots is being dealt with, all kinds of dirt on the wall should be cleaned, and the water should be moistened one day in advance. If the grass-roots level is a new wall, when the cement mortar is 70% dry, bricks, bullets, and sticky-sandwich wall tiles should be used.
2: Tiles must be soaked in clean water for more than 2 hours before the paste, bricks do not bubble prevail, remove the dry stand-by.
3: When meeting the pipeline, lighting switch, bathroom equipment supporting parts, etc., must use a whole set of bricks to cut anastomosis, prohibit the use of non-complete brick patchwork paste.
Laying of floor tiles:
1: The tiles should be immersed in water for half a day before use. Bricks should not bubble.
2: The kitchen and bathroom should have a water gradient, no water, water does not flow back. If the original waterproof layer is destroyed during construction, waterproof treatment shall be done. There is no leakage during the 12-hour test of accumulated water.
3: After the floor tiles are laid, bricks should be covered with cardboard, etc., and walk on the brick surface at least after 24 hours.
After tile, note:
After laying for 1 hour, the cement, caulking agent or other sticky objects left on the brick surface should be wiped off in time, because it is difficult to clean after four hours like the caulking agent. After 12 hours of paving, check the brick surface and if there is any empty drum sound, re-lay it. Paving bricks can be walked after 24 hours, scrub thoroughly, mix the clean water with clean water, and thoroughly clean the tiles.
Summary: With these small methods, after the small precautions, I believe that even if you are the first time the owner of the renovation will not be fuss.
Tile Laying Tiles Buying Tiles Care Cement Space Switch Decoration Design Decoration Bathroom Design Toilet Waterproof Bathroom Tiles Bathroom Tiles Bathroom Size Kitchen Tiles Tiles Specifications
The carbon dioxide Incubator is suitable for research in a wide range of fields such as cell biology, oncology, genetics, immunology, virus research, cytology and modern genetic engineering research
Co2 Incubator,Carbon Dioxide Incubator,Thermo Co2 Incubator,5 Co2 Incubator
Zenith Lab (Jiangsu) Co.,Ltd , https://www.zenithlabo.com